
The Unnamed Flight Manual #
Welcome to the Unnamed flight training manual. This manual serves as a guide to help you understand the best practices to help you fly or gun in Star Citizen. This manual is a living document that is subject to change as new information and content arrives in Star Citizen.
“Air power may either end war or end civilization.”
― Winston Churchill
Game Settings #
Most of these settings below can be found in the Star Citizen’s Option menu → Game Settings at the main menu or in game and do not require a restart. Alternatively some of these settings can also be found in your ships MFD’s, but changing settings this way the settings do not currently save for all ships. These game settings work with MKB, HOTAS and Dual Stick setups. 1
Mandatory Game Settings #
These settings are highly recommended and can provide you with a huge advantage once you master them.
Flight – Decoupled On: No
- Default Keybinding – “C”
- Decoupled offers a smoother flight experience and less resistances while flying.
- Decoupled mode is superior in combat with small and medium ships as it allows you to fly with less input.
- The downside to this mode is it takes an average of 5-10 hours to learn and around 20-30 hours to master if not more.
- Recommended for new pilots to turn this off while around Stations, low altitudes, taking off or landing.
Flight – G-Safe On: No
- With G-Safe turned on, think of it as training wheels for a bike and it is time to take those babies off.
- While G-Safe is on your ship it will limit the amount of G’s you can take by almost a full 50%. This will limit your ships maneuverability in combat.
- The downside is now your pilot can blackout or redout causing you to lose complete control of your ship until you recover. This can be completely avoided with more practice and experience while flying by compensating with strafe or keeping your momentum in check.
Flight – Speed Limiter On: No
- When you switch between SCM to Navigation mode your velocity will stay the same.
- Flight – Proximity Assist On: No
- This setting will change your speed and even move your ship if you come close to an object, terrain or even an enemy ship. This will hamper you in combat so it is best to leave it off and learn to not crash.
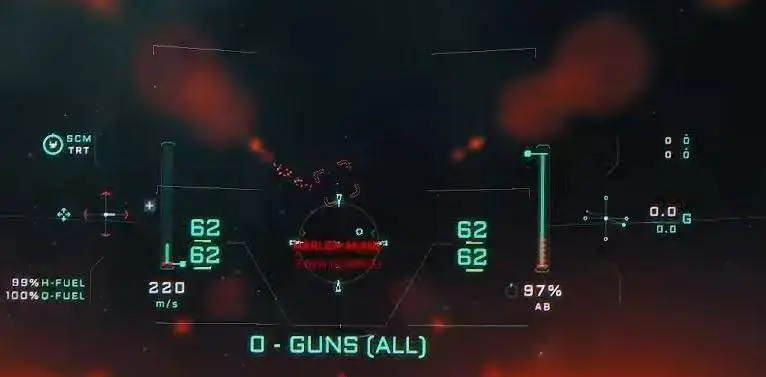
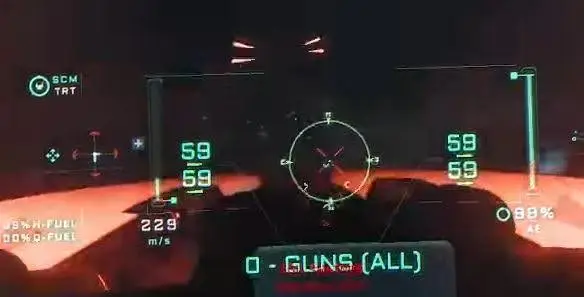
Flight – Advanced Hud for SCM and NAV: Yes
- Provides you with more information about your velocity, altitude, weapons, boost and other critical information in the center of your screen.
- This is preference but it is also recommended to turn on Advanced HUD prefers labels. This will use letters instead of symbols.
Flight – Course Prediction: Yes
- Your HUD will now show you where you’re going, it’s good to know where you’re going.
Defaults – Lights – Enabled: No
- This will turn off all external lights on your ship.
Squid Pilot 1 – “Hey! I just added all these stealth components to my ship!”
Squid Pilot 2 – “But your lights are on…I can see you… So does the enemy.”
Pilot – Velocity Indicator – Always On
- Leave an indicator on your HUD to show where your ship is going.
- Very Helpful while learning to fly Decoupled
Default’s – Weapon – Fading PiPs On: No
- Your target’s PiPs will always stay visible and not turn off no matter how close you get to them.
Vehicle – Targeting – Enable Auto Zoom On locked Target: No
- With this setting on it will automatically zoom in on your locked target thus decreasing your awareness around the target and possibly distracting you.
Party Nameplate Distance: Maximum
Show Friendly Contact Nameplate: Yes
Squid Pilot 1 – “Hey I need help!!!!!”
Squid Pilot 2 – “Which Hornet are you again?!?!?!”
Show Neutral/Hostile Contact Nameplate: Yes
Recommended But Not Mandatory #
These settings may help you, but is it up to you to turn them off or on.
Show Hints: Yes (New Player)
Control Hints: Yes (New Player)
Ship Entry Labels Enabled: Yes (New Player)
Flight – Automatic Slowdown On: No
- this setting doesn’t just limit your speed, it also limits your acceleration, making it much harder to stop when coming in for a landing. Its better to land in SCM and use the space brake if you need help slowing down.
Flight – ESP On: Yes
- This is for aim and mandatory for Mouse and keyboard setups. HOTAS and Dual Stick users should check with their settings.
Flight – Gravity Compensation On: Yes
- While in atmospheric flight your ship’s computer will help you compensate for the planet or moon’s gravity
Flight – Space Brake Enables boost: No
There are times you’ll want to use space brake without wasting boost, or times you’ll want a more gradual slowdown. If you need more thrust then press the boost key while holding space brake.
- Default Keybinding “X”
- While you brake your ship will use boost to help you slow down faster.
- Keep a careful eye on how much boost you have left to stop or to stop and disengage.
VJoy – Visibility: Always Visible
- VJoy stands for virtual joystick and will be represented by a line that moves to the direction you are moving with your mouse or stick in game. Learning VJoy will help notify you to keep your target in the pitch instead of strafe.
VJoy – Show Deadzone for mouse: Yes
Pilot – Look Ahead – Enabled: No
- This setting is for people with no head tracking. If you use head tracking, do not turn this off.
Personal Preference Settings #
These are settings that you should be aware of and might want to test and change for sensitivity, feel or DPI reasons. The recommended ranges I have gathered are from PvP communities.
Pilot E.S.P. Strength
- 0.8 – 1.00 (Recommended to keep at 1.00)
Pilot E.S.P. – Dampening Curvature
- The standard is between 0.00 and 1.00 (Recommended to keep at 0.00)
Pilot – VJoy – Range Yaw & Range Pitch: 11.00
- This is an aesthetic choice.
Pilot – VJoy – Mouse Deadzone
- .10 – .20 but mouse/DPI dependable ( Adding a little deadzone will help with over steering while flying.)
Default – Weapons – Default Convergence Distance
- Recommended to leave at default
- If you are not locked onto a target your weapons will converge at the distance you set.
- This setting can be helpful for targeting soldiers on the ground for PvE or PvP purposes.
Defaults – Weapon – Lag PiPs On: No
Cinematic vs Advantage #
These settings could be graphical, audio or features that make the game more cinematic but leave you with a disadvantage. These are personal preference but these settings could give you a combat advantage.
Vibration: No
Camera Spring Movement: No
Default – Weapons – Magnified UI On – No
- Zooms your camera automatically onto your target.
G-Force Induced Head Movement – 0.00
- Your camera will react to the amount of G’s you’re experiencing.
G-Force Induced Afterburner Zoom – 0.00
- Your Camera will zoom in while using the afterburner.
Global Camera Shake – 0.00
Audio-Driven Camera Shake Strength – 0
- Music or explosive sounds will cause your screen to shake.
- You will find this setting in Options Menu → Audio
Game Settings And Keybinds For Gunners #
These settings are for crewmembers gunning in a ship. The hope is to find a smooth experience to lock and engage targets in combat.
Turrets – VJoy – Range Yaw (degrees): 4.0 – 10.00 Mouse and DPI Depending
Turrets – VJoy – Range Pitch (degrees): 4.0 – 10.00 Mouse and DPI Depending
Turrets – VJoy – Mouse Deadzone (% of the range): .10% – .20% others recommend 1-2%
- Adding deadzone will help you stop over correcting and inputting slight movements that may throw you off target. This is something you want to adjust for your preference.
Turret Centering by default – C
- Automatically moves your turret to realign with the front of the ship.
Relative Mode by default – Q
- Switch your aiming from VJoy to Relative which offers a precise but slower way of tracking.
Gyro Mode by default – E
- Gyro mode acts as a stabilizer and keeps your turret independent of the ship’s movement.
- GYRO MODE SHOULD ALWAYS BE ON IN COMBAT.
Switching between gimbal Modes – G
- Gimbal modes are different ways your turret locks on to a target.
- Fixed Mode (FXD): Provides aPIP and your weapons fire wherever you’re pointing.
- Manual Mode (MAN): Provides a PIP and Your guns will slightly gimbal to adjust fire to hit your target.
- Automatic Mode (AUTO): Provides no PIP but while you’re in this mode a circle will appear around your crosshair. When the target is close enough the circle will turn green, when this happens your guns will automatically gimbal to the locked on target.
Precision mode – Right Mouse Click
- Precision mode is for targeting components on a ship be it engines, weapons or other critical areas.
- Precision mode will attempt to gimbal your weapons to make the projectile fire where your crosshair is pointed.
- Holding down the right mouse button will provide Zoom.
Radar Control #
As a pilot or gunner you have the ability to control your radar by either condensing or expanding your radar screen. Below is a picture of a radar in Star Citizen. The outer blue circle of the radar shows you degrees that change while moving (Example 360°) , Radar magnification numbers (Example x1,x10,x100 and etc.), white Triangles for your ship and other radar contacts and a Yellow arrow.
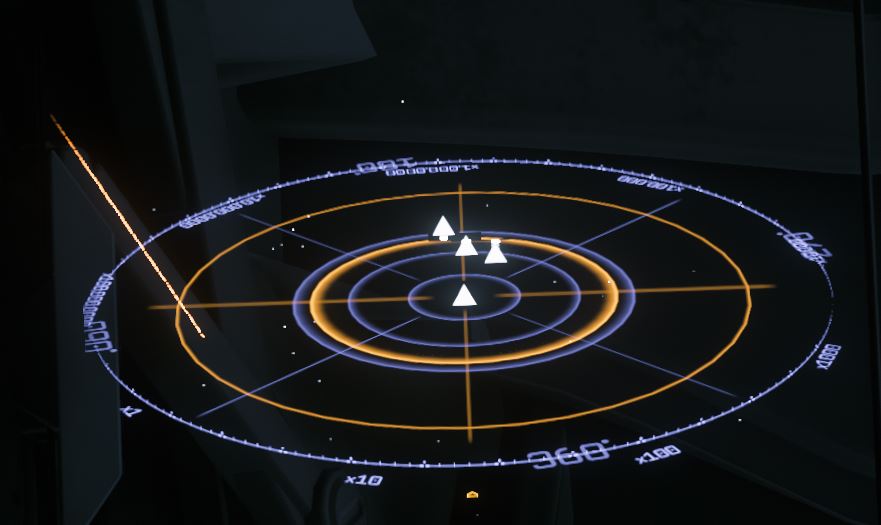
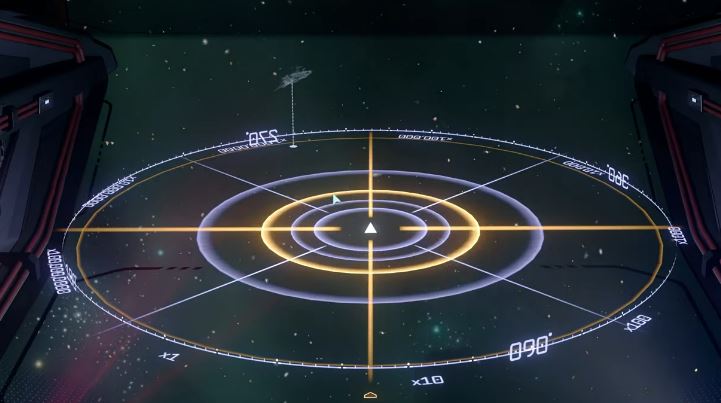
To change the radar zoom settings:
- Hold-down the interaction button: Default key bind “F”
- Press your middle mouse button to zoom in or you can scroll in.
- Move your cursor inside the radar.
- Use your mouse scroll wheel up and down.
- Mouse wheel down: Zoom out
- Mouse Wheel up: Zoom in
- After you set your radar you can right mouse-button click on the radar screen to lock your settings (a small lock will appear under the yellow arrow).
- Lastly you can left mouse click on a radar contact to lock onto a target.
Emissions and You #
Have you ever found yourself unable to lock onto a ship that’s actively targeting you—even at close range? Or dropped a series of flares, only to watch enemy missiles still find their mark? It all comes down to emissions.
In the Star Citizen universe, ship detection and targeting rely on three key emission types: Infrared Signature (IR), Electromagnetic Signature (EM), and Cross-Section (CS). Understanding these emissions is crucial for both evading threats and locking onto your enemies.
Infrared Signature (IR) – This represents the heat emitted by your ship, detectable by enemy scanners. Every component in your ship generates heat as it operates, with power-hungry systems producing even more. Your IR signature constantly fluctuates, influenced by the components you use and how intensively they’re running. Managing heat effectively can mean the difference between staying hidden or becoming an easy target.
Electromagnetic Signature (EM) – Ship components don’t just generate heat; they also emit an electromagnetic signature when active. The biggest contributors to your EM signature include energy weapons, shield generators, power plants, and most notably, your active radar.
Effective power management is key to reducing your EM footprint. Running full power to weapons, shields, and other systems will make you significantly easier to detect—so knowing when to dial it back can give you the edge in stealth and survival.
Cross-Section (CS) – Think of CS like modern radar detection: the larger the ship, the easier it is to spot. Ships with flat, angled surfaces are harder to detect, while bulkier designs stand out more on scanners. But don’t worry, larger ships aren’t without options. Stealth armor plating can help reduce your CS, and adjusting your ship’s angle relative to enemy sensors can also make you less detectable. Positioning and load-out choices play a crucial role in managing your visibility.
Now that we understand the three types of emissions in Star Citizen, how can we reduce them—or manage them effectively in combat?
*A Note on Coolers
In the future, ship coolers will play a key role in lowering your IR signature. However, as of version 4.0.2, coolers are still non-functional.
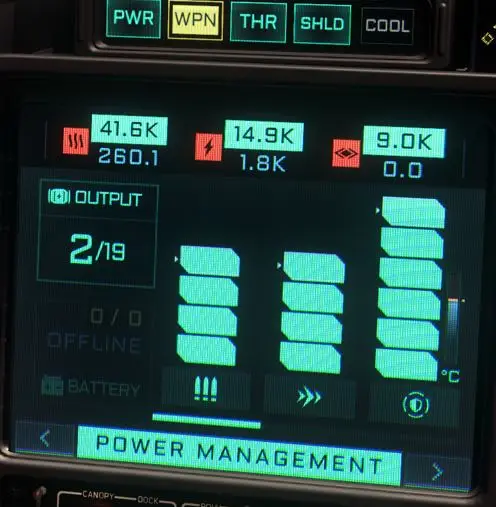
Managing Emissions
1. Power Management
One of the most effective ways to control emissions is through power distribution. Reducing power to weapons and shields lowers your IR and EM signatures, making you harder to detect.
While keeping shields maxed out is crucial in combat, flying around with them fully powered at all times generates extra heat and EM, making you an easier target.
2. System Optimization
Another key strategy is prioritizing essential systems based on your situation, for example
-If you’re flying a cargo hauler, disabling non-essential systems—like your ship’s built-in tractor beam—can help reduce emissions and keep you off enemy radar.
– If you’re wearing a helmet, you may not need life support running
– If you’re mining or salvaging, diverting power away from weapons and engines allows for a lower signature as you really only need shields and your quantum drive operating.
3. Ship Parts
It’s no secret that higher-grade or specialized ship components can come with lower emissions. Understanding your ship’s load-out and keeping an eye out for potential upgrades is key to staying stealthy and efficient.
For a deeper dive into optimizing your ship’s components, check out our Ship Parts Guide, where we break parts all down in detail.
Hopefully, this guide has given you a better understanding of emissions and how to manage them. With this knowledge, you’ll be able to make smarter decisions in combat—whether that means dropping 4-5 flares instead of just 1-2 to shake off a missile, or setting up the perfect ambush by powering down and hiding in an asteroid field.Mastering emissions can mean the difference between being hunted and becoming the hunter
 Author: Wyldren
 Collaborators: NazTheEternal, Loremlpsum & Frannz
- These settings reflect Star Citizen Alpha 4.0.1 and are subject to change. ↩︎


